I just wanted to pop in and say a quick hello. Don't worry I didn't forget about you:). Has anyone been keeping up with the Olympics? Whew! We were on the edge of our seats watching Lochte deliver Phelps butt to him on a solver platter!! My husband was screaming at the top of his lungs. It was crazy. And then what about the male gymnastics? I could not believe that we didn't do better. After all it is our thing after swimming.
Anyway I just wanted to let you all know that I will be debuting a tutorial tomorrow!! Don't get too anxious now;) we also will be transforming two 68"x48" slats into a king sized platform bed and repurposing slats from two 30+ year old boxsprings in to a headboard. Also pictures will be up soon with a linked in tutorial of my son's vintage map wall decor!!
Have a blessed day!!
.Portia
Sunday, July 29, 2012
Thursday, July 26, 2012
Happy Father's Day!
I just wanted to come on real quick and give a quick Father's Day shout out. Without dads most things in life would not be possible ranging from making children to providing an equal parenting balance in the home. Dads you also provide strength, love, gentleness, firmness and security only to name a few. Thank you.
Friday, July 20, 2012
Beds, Beds and more BEDS!! Part 1
When it comes to cheapness we're right there. I mean we're down in the dirt with the worms. We go to thrift stores, Good Will, Salvation Army and yardselling. We even drive around Navy housing looking to see what people are giving away for free(provided it's a good quality). Now most people I would assume, are looking for clothing or little trinkets to dress their home with. And a lot look for refurbishable furniture. I am one of those people that has absolutely no luck finding great finds. I'm not sure if I go at the wrong time, or if I'm too busy trying to corral my four little ones that I just miss that diamond in the rough. So as a best case scenario, I've decided to enlist the brawn of my husband and make our own quality homemade furniture. Many of you know this from my Facebook posts or reading this blog.
Ok I know I'm starting to lose you. So... here's our next almost finished project(s). We currently for the last week or two and including the upcoming week building all new beds in our home. Back in January when we had a queen bed, our frame broke!! One of those metal frames that can fold up broke!! While we were chillin' in bed. The hubs and I were fighting(totally play of course) over what to watch, golf or HGTV. And I guess while we were wrestling, the leg said "I quit" and just gave out on us. And wouldn't you know, the same thing happened to ALL of our kids beds too. Seamus' slats failed to keep him supported. Lylian had a cheapo toddler bed that kicked the bucket within 10 months of it being purchased. And Maddalaena had Lylian's old crib that we converted to a toddler bed and that just up and jumped off a cliff. Then we got a few replacement beds for free. Now those aren't working out. Ergo we're making kick butt new beds. They're low to the ground so no toys can hide out, and IF our children decide to fall off, they won't have far to fall. So here's the progress so far...
Richard wanted a "man" shot of him lifting something big lol.
Hey measure twice and cute once right?
I kept screwing up him by talking to him lol. And he wanted to make sure that I got an action shot.
Well here's that crappy slightly dark but wonderful action shot he was talking about. The blade is actually rotating.
Here is Seamus' frame to his bed laid out. My husband is a perfectionist and squared each corner at least 5 times. No joke.
Here he again...squaring
The corner. Nice isn't it?
And here is my youngest little girl. In her brand new romper spoken dress. She loves this thing. Cool thing about it is that I got it for free. All I had to do was pay shipping.
The side and middle supports are in!!!
Up close, slightly and uncomfortably personal.
Another action shot. My hubs is so wonderful that he actually posed for a lot of these photos. Well, he posed because the saw was really loud without ear plugs. Yes I know this is a drill lol.
And there are the legs in all their shapely and naked glory.
And now the slats are being hammered in place.
And here she is in all her bare boned glory. Rich built this full sized platform bed in two and a half hours!!!! Crazy I know!! He is Ah-MAZING!!!
Side shot. Makes me think of BBQ ribs. Hot.Off.The.Grill. Ooohhh Yeeaahh.
The first coat of paint is on. Tomorrow I will be finishing up the paint job for this bed and helping the hubs disassemble the other bed. These plans are from Ana White's Hailey Platform Bed Project Plan. I love me some Ana White woodworking plans. They are awesome and super easy to follow. And I love how she makes plans for projects that can be done at an inexpensive price.
Are any of you getting ideas to start building your own furniture? Or if you're not ready to build are any of you thinking about refinishing furniture? Let me know if you have any ideas or if there's anything you'd like to see me do!
Wednesday, July 11, 2012
Four Little Gems: My Days in Instagram
Four Little Gems: My Days in Instagram: Imma tell you a little secret... I have fallen in love with Instagram. I think that it is so awesome that you can take and edit photos all ...
My Days in Instagram
Imma tell you a little secret... I have fallen in love with Instagram. I think that it is so awesome that you can take and edit photos all with a few buttons on your portable device. I just think that it's amazing. You can make a bowl of the most boring cereal look down right amazing! Here are some pictures of my daily life taken in Instagram. I hope that you enjoy them!!
Starting off an afternoon(cause that's how I roll) with a cold glass of Lemonade Iced Tea. And yes the Iced Tea is freshly prepared by using tea bags. I love with this filter did to my nail color!!
Daddy enjoying some bonding time with our youngest, Blake.
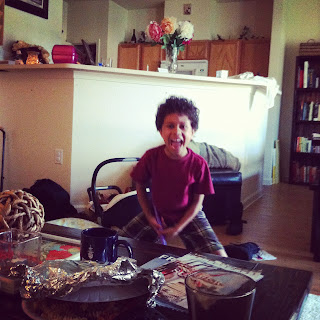
Are all 6 year old boys really this crazy? This is Seamus, crazy and wacky extraordinaire. He blurts out sounds and words at an ear splitting volume and then takes off running throughout the house. Is it just me or is this typical?
Please disregard that previous question. The apple doesn't fall far from the tree...
My son absolutely adores anything his father does. Golf, video games, chips, soda just to name a few. But one thing that he has caught a bug for is soccer. He is naturally talented in that realm. I played it in high school but that was it. He just goes mad for it! He was receiving a medal in this picture.
This was his team this past spring. I'm about to sign him up for the fall session.
This little decorative endeavor was Pinterest inspired. I used one 8ft. MDF board(cost me $3.88), scrap book paper(around $.59-$1.99 per sheet), circular saw and Mod Podge.
Okay Quick tutorial. First Cut your MDF board into the size(s) you want. Apply paper to board(s) with Mod Podge. Trim edges if necessary(I had to). Then apply two more coats of Mod Podge with drying in between. I hang or prop it up somewhere and voila! You have homemade art. Nifty huh?
Blake was a big boy at birth weighing in at a whopping 10.4lbs. This was a picture I took(duh!) of his thigh when he was only a few weeks old!
My little sleeping man
Ever since Blake has been born my eldest, Seamus has been extremely excited to do anything with Blake. Which is a blessing and a curse if you ask me. It's a blessing because he's so willing to help out. But it's a curse because he can be over zealous.
Brotherly love. I think this explains their relationship perfectly :)
I our house glasses don't last very long due to the clumsiness of a certain individual. I won't name and names. So as a way to say money, I just converted our old Classico spaghetti sauce jars into drinking glasses by washing them in the dishwasher. I know it was tough, but I managed. This is a pic of one of the jars with that Lemonade Iced Tea.
What? A mother has to have a picture with her baby. You know one that doesn't make her look bad.
My fourth of July mani. I used Wet n' Wild's Fast Dry in Saved By the Blue, Julep's Christina(dupe for that is Finger Paint's Vermillion and Painting. Can be found at Sally's Beauty Supply) and Sally Hansen's Crackle Overcoat in Snow Blast. With a base coat of Essie's Feed Me and a top coat of Essie's Good To Go. I applied the base coat, two coats of Christina, did a gradient of Saved by the Blue and topped it off with the crackle overcoat and a top coat.
These jars-into-glasses look much better when propped in front of home decor magazines.
This was another DIY project. The lamp in this picture has been in our house for a few years now. It used to be more of a bronze color. It's from Wal-Mart, this is a lamp with the same color. I spray painted it with Rusoleum's American Accents Satin Metallics Aged Bronze. I also bought this super uber cool Shade from Wal-mart(?) as well, but don't quote me on it.
This is one of the few moments where my girls are showing their sisterly love in front of me.
Blake was feeding in this pic. I spared you a shot of my boob. You're Welcome. That would have been a little awkward. Wouldn't you agree? It would be like "Oh hey, check out these cool pics and captions on Portia's WHOA BOOBIES!!! I'm never coming back here again..." I wanted to avoid all of that.
In Blake's mind it's going one of two ways "Welcome to the party!" or "You can look, but all this milk is mine. MINE I TELL YOU!!!".
A banana rope ball purchased at Pier 1 Imports.
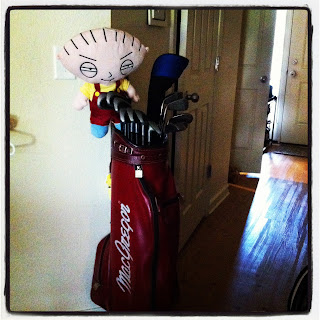
My hubby's new-to-him super cool golf bag with clubs he scored for $25 at the local thrift store. To all of you in the Groton-New London area. Go to Serenity Thrift and Bookstore on Rte 12. It's a hop skip and a jump away from the Dunkin Donuts with the drive thru by Sleepy's. And across the street and down a little from Bank of America. One of Richard's students gave him the Stewie club cover as a graduation gift( he's a SONAR A school instructor at Subase New London).
I hope you enjoyed the pics and captions!! Have a blessed day everyone!
Tuesday, July 10, 2012
DIY Glass Thumb Tacks
Can I say that I absolutely LOVE DIY projects!!! It's one of those things that if you complete it, successfully(according to yourself), it boosts your self-esteem like 10 notches. I know that's how I feel when I complete a DIY. A lot like most of you I'm a Pinterest-a-holic. I scour Pinterest for ideas and inspiration for my home and my everyday life. I've made a few recipes and some decor items. My husband has also made furniture from plans found on Pinterest like the Tryde Coffee Table and the Farmhouse Table and Benches. These plans can be found here on Ana White's Website.
Here is my next DIY. And yes, lol I'm pleased with this one too! I'm already planning for Thanksgiving and Christmas ones :). Onto the project!!
Whoops!! I have to announced that I have posted this on the Bower Power Blog for the 2012 Pinterest Challenge!!! Come on and check out all the really cool Pinterest inspired goodies a whole bunch of lovely people have made!!
DIY Glass Thumb Tacks
The Inspiration For This Challenge Found Here
Supplies:
Glass Beads
Scrapbook Paper or Fabric
Thumb Tacks
Super Strength Craft Glue( I used E-6000 purchased at Michael's)
Regular Glue
Tooth Picks
Craft Scissors
And a Pencil
(No picture of course. I hope you all know what a pencil looks like lol)
This project was pretty inexpensive. I had all but two items on the supplies list. The missing items I purchased at the Dollar Tree. But I'll give you a rundown of what everything cost me approximately.
Scrapbook paper $.59-$.99 a sheet at a craft store like Michael's. With that you could make a gazillion of these alone!
Glass beads $1 at a dollar store
Glue $1 at a dollat store or Wal-Mart
Craft or Kid Safety Scissors $2-$4
E-6000 or similar glue $4
Thumb Tacks $1 at a dollar store
Pencil $1 for a pack at a dollar store
Now that we have all of that situated let's begin!
First, you're going to want to take your scrapbook paper or fabric. Lay it out on a clean surface.
Grab a little glass bead and trace it with your pencil onto your paper or fabric.
Cut out your little tracing. But remember to cut the circle/oval smaller than the glass bead. You don't want any paper sticking out from the sides.
Spread a thin layer of glue onto the back of the glass bead. I used the tip if this Martha Stewart glue bottle. Please ignore the pots and Rubbermaid container in the background lol.
Then stick your cutout onto the glue covered bead. And press a little firmly to be sure the glue is spread out evenly.
The next two steps I forgot to take pics I'm so sorry for this. But use your imagination and you'll do fine. I promise.
Okay now you're going to want to be careful and fast at the sametime. I know doesn't make sense, but it's true. Set aside a thumb tack. Make sure it's visible and well with in reach. Okay. Good. Now,grab your super glue/adhesive and a toothpick. Carefully but swiftly squirt some of that glue onto the toothpick. Now apply the crafty super glue to the back of a thumb tack. Got it?
Now gently adhere the crafty super covered thumb tack to the back of your paper/fabric covered glass bead and press firmly. But make sure not to disturb the paper/fabric while doing so.
Yay picture!!
(See in this pic you can see that I obviously cut my paper too big. I had to go back a trim it up after everything was dry)
Now repeat this whole process again and again until you have the number of glass thumb tacks you want. Word of advise though, cut out all your paper/fabric circles first. Then follow the above steps.
My finished products!! Enjoy!!
For more of my completed DIY's check out these pages:
Wow, lol, that's not a big list. I could have sworn I've done more than this. Anyway, are there any DIY challenges you've completed or are in the middle of? I'd love to hear about them!! Do you have any DIY you'd like to see me complete? Is so just let me know! Send me a message or PM with all the details. Thanks!!
Subscribe to:
Posts (Atom)


